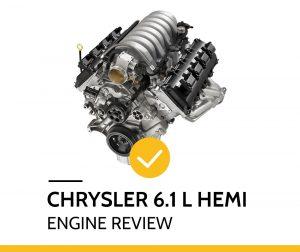
The Chrysler 6.1 L Hemi engine may be one of the most underrated engines on the road today. Though it was discontinued in 2010, this engine is still a popular choice for many drivers. In this article, we’ll take a closer look at the Chrysler 6.1 L Hemi engine and what makes it so special. We’ll also discuss some of its pros and cons, so that you can decide if it’s the right choice for you. So, let’s get started!
Chrysler 6.1 L Hemi Engine Review [hide]
HEMI 6.1 L Engine Specs
Chrysler’s 6.1 L Hemi engine is a family of high-performance pushrod V8 engines for trucks, vans and SUVs. Introduced in 2003, the engine uses an alloy block with cast iron cylinder liners. The early version had two valves per cylinder, while current models are equipped with four valves per cylinder which improve the engine’s performance, fuel efficiency and reduce noise, vibration, and harshness (NVH).
The first generation of the 6.1 L Hemi was introduced during model year 2004 as a more powerful all-wheel drive (AWD) truck engine option on Dodge Ram 1500s and Durangos and as a FWD option on Chrysler 300s and Chargers. After 2007 it could be found in some versions of the Chrysler Aspen and Dodge Durango.
The second generation Hemi debuted during the 2008 model year on Charger, Challenger, Ram, and Grand Cherokee models equipped with a 5-speed automatic transmission on Magnum version Super Bees. The first performance application outside a factory stock vehicle was on a modified SRT8 392 of Fast & Furious movie fame. A new high-performance variant, rated at , is used in the 2012 Ram 1500 ST Pickup for improved towing capacity of 12,280 pounds (5443 kg) as well as higher rates of acceleration . In October 2012 an upgrade to 376 horsepower was announced by Chrysler Group LLC CEO Sergio Marchionne. A cylinder head design features four valves per cylinder, the most of any pushrod V8 engine in Chrysler’s history.
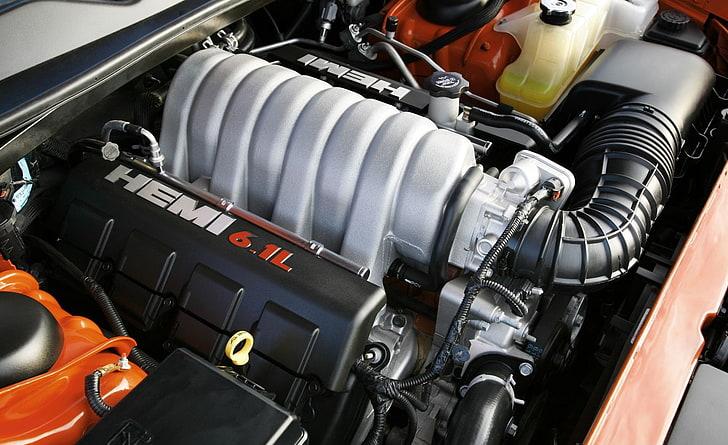
HEMI 6.1 L Engine Overview
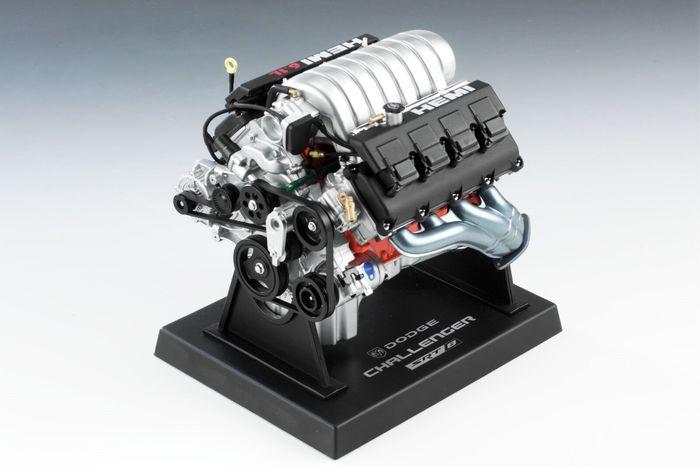
The HEMI engine is named after the hemispherical combustion chambers in its cylinder heads. This design requires more complex head gasket or head bolt sealing surface machining than a hemi-head style which are flat on one side. There are 2 spark plugs per cylinder for better fuel economy and increased power output. The HEMI engine also has an 8 bore 3.92″ stroke crankshaft, 7 main bearings plus 1 thrust bearing, moly coated pistons with floating wrist pins, improved oil spray piston cooling jets on all 4 cam towers, electronically controlled throttle body (drive by wire), high capacity aluminum pushrod tube intake manifold with 2 separate throttle bodies (1 for each bank of cylinders), forged powder metal connecting rods, and a forged steel crankshaft.
The HEMI 6.1 L V-8 engine is a modern marvel of power, efficiency, and aesthetics. The engine was first produced in 2003 for the year 2004 Chrysler 300C models. It features aluminum blocks with cast iron cylinder liners, deep skirt cast iron block design with 4 bolt mains, cross bolted main bearing caps, forged steel crankshaft, forged powder metal connecting rods with floating wrist pins, 4-valve per cylinder heads with roller finger followers, twin spark plug ignition with individual coil pack ignition system, high flow aluminum manifolds and tubular exhaust headers. The engine has electronic throttle control for increased fuel economy, variable camshaft timing (VCT) which improves performance at all rpm ranges especially the low end torque. This engine is currently used in many Chrysler models including 300C models from 2004 to 2010, Dodge Charger Magnum R/T Daytona R/T , Challenger SE SRT8 392 models from 2008 to 2014.
HEMI 6.1 L Engine reliability
The 6.1 L Hemi is Chrysler’s newest engine design, which was discontinued in 2013 due to its high cost of production and low demand. The 6.1 L Hemi is extremely reliable when it comes to major problems; however, there are still some common issues associated with the engine that automotive enthusiasts should be aware of before purchasing a used model.
Chrysler also retuned the engine’s fuel injection system to optimize performance, and a new aluminum intake manifold with integrated charge air cooler helped increase airflow into the combustion chambers. The valve train was designed to reduce noise and vibration as well as improve fluidity over an extended service life.
HEMI 5.7 L Engine Key Features
The HEMI 5.7 L V8 engine is the latest of Chrysler’s powerful Hemi engines that have been dominating on-road and off-road performance for more than half a century since the brand first introduced it in 1951. The redesigned 6.1 L (370 cu in) HEMI was engineered to be more efficient, yet still maintain impressive power output while providing improved fuel economy over its predecessor.
The engineers began by enlarging the bore spacing – this allows larger cylinder bores without increasing the overall size of each benchmark component – which produces an ideal four-stroke reciprocating motion among cylinders when compared with their displacement (or cubic inches). This means that there is less distance between pistons’ strokes per cycle, and creates a more efficient use of the engine’s power output. The new HEMI design also uses oil control rings on the pistons to reduce friction by maintaining a thin layer of oil between each piston ring, which in turn reduces fuel consumption. Check out it’s key features:
- The 6.1 L engine is offered in two variations: the 426 HEMI and the 392 HEMI
- Horsepower varies based on application; for instance, the 426-horsepower version is used in Challenger SRT8 Supercars while a 345-horsepower version is used in Ram pickups
- 1 Liters of displacement provides up to 470 lb-ft of torque or 425 horsepower at 6000 rpm depending on which variation of the engine is being discussed
- This power goes through an automatic six-speed transmission with manual mode capabilities to rear wheels that are 3.09 inches wide (optional limited slip differential).
HEMI 6.1 L Engine Horsepower
A performance vehicle’s power is directly correlated with its horsepower. This is why the HEMI 6.1 L Engine has gained so much fame, it packs quite a punch at 390 horsepower and 410 lb-ft of torque.
HEMI 6.1 L Engine Oil Viscosity
The Hemi V8 engine should use the MS-12633 oil quality specification and viscosity SAE 0W-40.
HEMI 6.1 L Engine Oil Capacity
6.1L V8 Hemi gasoline engine requires 7 liters of 0W-40 engine oil with an oil filter change.
Best Oil for HEMI 6.1 L Engine
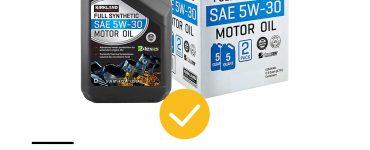
Engine oil is one of the most important fluids in your daily life. It lubricates your engine’s moving parts, reducing friction and heat generated by these parts. For this reason it can greatly affect the performance of an engine, especially one as powerful as a Chrysler Hemi 6.1 L Engine. The most reliable thing you can do is check your owner’s manual for specifications before choosing the oil. Here’s our top brands for your engine:
Pennzoil Ultra Platinum Full Synthetic 0W-40 Motor Oil
Valvoline European Vehicle Full Synthetic SAE 0W-40 Motor Oil
Mobil 1 – Synthetic Motor Oil 0W-40
Castrol 03101 Edge 0W-40 A3/B4 Advanced Full Synthetic Motor Oil
Liqui Moly Synthoil Energy A40 0W-40 Synthetic Motor Oil
Car models using HEMI 6.1 L Engine

Dodge/Chrysler 6.1 V8 engines are found in the following cars:
- 2005-2010 Chrysler 300C SRT8
- 2006-2008 Dodge Magnum SRT8
- 2006-2010 Jeep Grand Cherokee SRT8
- 2008-2010 Dodge Challenger SRT8
- 2006-2010 Dodge Charger SRT8
Dodge HEMI 6.1 L Engine life expancy
The Hemi 6.1 Engine has been designed with durability in mind and is built to withstand wear-and tear, while providing high mileage that can reach up 250 000 miles!
Common Problems with HEMI 6.1 L Engine
There are many common problems with the HEMI 6.1 L engine including broken valves, broken timing chains, and oil consumption issues. Each problem deserves attention because each could result in a very costly repair if not addressed quickly.
- The crankshaft position sensor may fail. The cause of this failure is due to third party companies not providing high quality parts during the manufacturing process. This problem can be easily fixed by purchasing a new OEM CPS or an aftermarket part that uses better quality materials such as the ProSensor 7.
- The 6.1 L has a poor factory exhaust manifold design, which causes the “manifold cracking issue.” Although this happens frequently, it is only an aesthetic problem and not an issue with performance or emissions. This can be fixed by purchasing aftermarket manifolds that can support high horsepower numbers.
- There were problems with the spark plugs breaking off in the block while attempting to remove them; however, this was fixed towards the end of 2012 using better quality electrode designs and materials.
- When idling at higher RPMs (1500+), the engine may die for seemingly no reason because there are two camshaft position sensors instead of one like most vehicles currently on sale today. The fix for this problem is a simple wire fix which can be performed by a do-it yourselfer.
The common problems associated with the MDS system have been mentioned in other articles on this website, so please refer to those for more information on that subject.
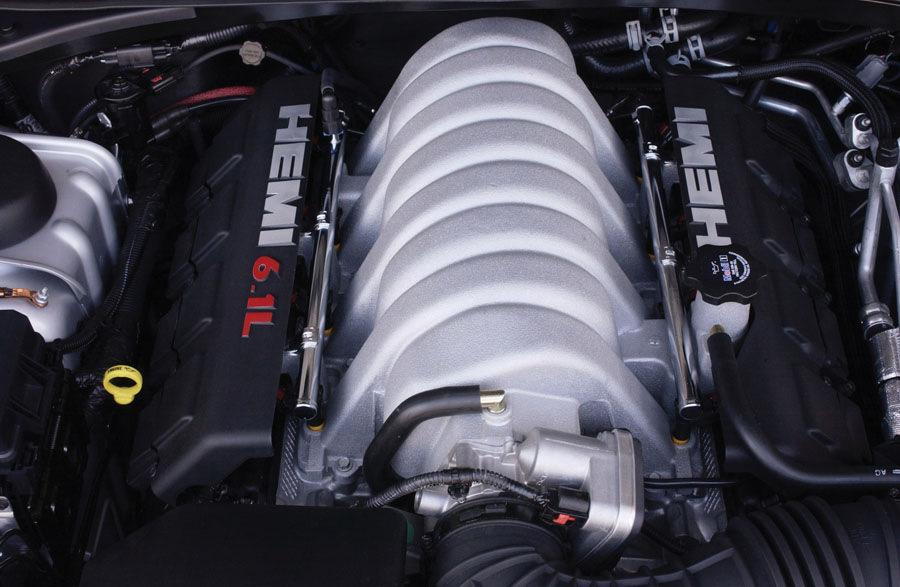
Dodge HEMI 6.1 L Engine Location
The engine is a V-type, multi-valve design located and it’s located in the front. It includes exhaust manifolds and catalytic converters.
Replacing Dodge HEMI 6.1 L Engine
The Chrysler HEMI 6.1 L Engine is a modern marvel. So far, this engine has set the standard for all others to be measured against. And yet, replacement parts are not as readily available on the market as say an LS Series GM V8 or even a Nissan VQ V6. This makes sense since Chrysler does not currently offer the HEMI 6.1 L Engine in any of its vehicles for sale to the consumer market, thus limiting aftermarket sales of these parts. Despite this, there are already a number of components offered by various vendors that can be used to replace worn out or broken pieces on your own.
But before you tackle this project, it is important to have the right tools and equipment. The following list should provide a good place to start, but be sure to read the first half of this article for a more comprehensive breakdown:
You will also want a buddy or two to work on your car with you as there are some heavy pieces under the hood. Be safe before beginning your engine replacement project by disconnecting both battery terminals, grounding yourself and wearing safety glasses at all times while working under the hood.
Do not attempt any repair without doing your research beforehand. In addition to using this guide as a simple step-by-step instructional manual, feel free to refer back here for tips and tricks on the more difficult aspects of this project. For more advanced projects, consider using a service manual specific to your vehicle.
Step 1.
The first step in this process is to remove the front bumper cover from the underside of the car by removing all 10 plastic push-pins that hold it into place.
Do not forget to unplug any of the electrical connections from underneath before moving onto next step! These include both fog lamp bulbs, turn signal bulb socket, horn wires/connections and cruise control connector under driver side light assembly. Once these pieces are disconnected you can unscrew them entirely for an easier removal process. To do so simply use a ratchet with extension and swivel joint on each end allowing you access to both sides of each connection.
Step 2.
Once the bumper is removed, you will be able to access the fog lamp housings.
The next step is to remove your radiator support panel, which requires removing most if not all of the plastic clips that hold it in place as seen below. Be very careful when doing so as there are several sharp edges on this piece. If you have any cuts or scrapes on your hands, you should cover them up with band-aids before continuing onto the next steps as they may get irritated by touching a rough surface while working under the hood. You can also use gloves if desired for additional protection from sharp edges and other dangers underneath your car’s front end. Again, make sure to secure all electrical connections so they don’t get in your way during this next step.
Step 3.
You will also want to disconnect the horn before moving on.
Your last piece of preparation should be to loosen both headlights enough so that you can lift them up once access is gained underneath the hood. Disconnecting these pieces is easy if done correctly; simply grab the outer portion of the headlight assembly closest to its corresponding fender and pull outwards while lifting upwards (away from grill). If for any reason one or more of the clips do not disengage, you may need to use a flat head screwdriver with rubber handle inserted between headlight housing and fender at base of clip/latch. This typically provides enough space to pry them free.
Step 4.
You should now be left with only the radiator and fans still in place.
You can now finish removing all 10 plastic push-pins holding the bumper cover on, as well as any other clips/pieces that you have not taken care of already. Once this is done you will have a clear shot at all necessary wiring including both fuel lines running into top of engine, ground straps along passenger side, starter cables beneath battery tray and most importantly for this project, your PCM connector underneath entire fuel rail assembly. Start by snapping off all 8 silver clips surrounding the fuel rails to disconnect them from their corresponding injectors.
Step 5.
At this point you will also want to disconnect your O2 sensors from their respective manifolds located just under the fuel rail on either side of engine.
The last major piece to unplug with this process is your PCM (powertrain control module), which is located underneath where your fuel lines run into top of engine block.
If you have a hard time removing this or any other component from vehicle, try using a flat head screwdriver wrapped with electrical/duct tape so that it doesn’t damage any wiring connected to it. Only use tools if needed and do not try doing anything more than removing components without consulting service manual for procedure specific to your make/model.
You are now ready to begin work on replacing entire engine starting with removal of stock V6 unit. This process will depend heavily how well you manage to rig up your new Hemi, as well as install time and any complications that may arise. For reference I am running a custom harness that follows under-hood wiring to the PCM location; if you keep this piece intact you will not need to modify it in anyway.
The first thing we did was disconnect both fuel lines from top of injection pump along passenger side of engine bay before removal of unit itself.
Next we removed all bolts holding engine onto engine mount and used power tools to remove entire assembly from vehicle.
Just so you know – if you do not have access to a forklift or other means of hoisting HEMI out of car safely, it is wise to wait until after installation of new unit back into car before hooking up fuel lines, starting engine for first time and allowing it to run with no load (i.e. with nothing hooked up to the alternator). If your new 6.1 L Hemi has any problems during this period you can simply disconnect its wiring harness again before lifting out of vehicle – which is much safer than doing so after installation!