Toyota Sienna oil change is a job that can be done by any person, with the right tools and knowledge. It doesn’t take long to accomplish, but it’s important to do so on a regular basis for your vehicle’s health. This article will provide you all the information you need to complete Toyota Sienna Oil Change in just minutes!

2011 Toyota Sienna Oil Change Guide [hide]
2011 Toyota Sienna Oil Type

It is important to use the right type of oil when changing your Sienna’s oil. The car requires a specific weight, viscosity, and API certification level that may not be available in all grades or brands. Make sure you check with your dealer before buying any brand for this particular vehicle model. If you’re only changing the filter, then it does not matter what kind of oil you use as long as it meets Toyota Motor Corporation’s requirements.
VISCOSITY GRADE
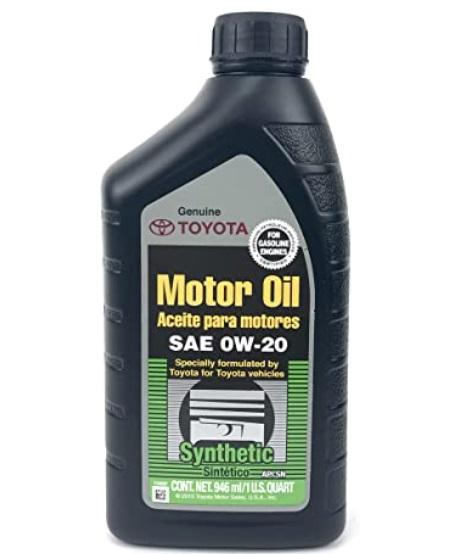
Toyota recommends using engine oil “Toyota Genuine Motor Oil” of viscosity SAE 5W-20 or SAE 0W-20. However, SAE
0W-20 is the best choice for good fuel economy and good starting in cold weather.
CAPACITY
The oil capacity 1AR-FE engine with filter is 4.7 quarts (4.4 liters), and without a filter is 4.2 quarts (4.0 liters).
Whereas for 2GR-FE engine without filter the capacity is 6.0 quarts (5.7 liters) and with filter, the capacity is 6.4 quarts (6.1 liters).
SPECIFICATION OF OIL
Standard Engine Oil (SAE 0W-20) is the standard oil that comes with your vehicle. This has been tested and approved for all Toyota vehicles by their engineers. The engine uses this when it’s brand new, so you should only use OEM or Genuine Motor Oil in your Sienna to ensure quality.
However, the use of synthetic oil, biodiesel, or any other engine oil not meeting the above specifications is allowed.
You can use oil from this list of brands to change your engine oil in 2011 Toyota Sienna:
- CASTROL
- PENNZOIL
- VALVOLINE
- ROYAL PURPLE
Here is important to know that all oils from these manufacturers have the same quality and specifications. You just choose what you like more price or brand name.
These are just examples. You can use other brands to change your Toyota Sienna’s engine oil, too. Just make sure the specs match what is required for the 2011 Toyota Sienna Engine Oil Capacity and Change Interval.
2011 Toyota Sienna Oil Change Intervals
It is recommended that your car 2011 Toyota Sienna gets an oil change every three months or every 3000 miles, whichever comes first.
If you live in a rocky area where there are dirt roads and go off-roading often, this could be shortened significantly and require more frequent changes of the oil.
Make sure to check your owner’s manual before changing the oil so you know exactly what type of synthetic oil and how often it needs to be changed in order to ensure optimal engine performance.
Best Oil for 2011 Toyota Sienna
The oil you use in your car is important. You don’t want to go with the cheapest stuff out there, but you also don’t want to break the bank on a name brand either. The best oil for Toyota Sienna 2011 depends on many factors including how much your drive and what type of driving you do most often.
Oil (By Manufacturer) – Toyota recommends using “Toyota Genuine Motor Oil” SAE 5W-20 or SAE 0W-20.
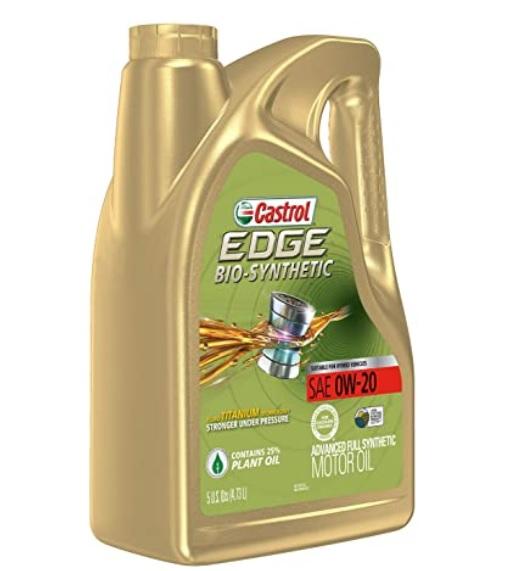
Oil (Our Choice) – Castrol Edge Bio-Synthetic 0W-20 Advanced Full Synthetic Motor Oil. Advances in engine technology have led to increased power and efficiency, meaning engines work harder and under higher pressures than ever before. The only thing keeping metal engine components apart is the oil, so it needs to be strong and remain strong. Until now there hasn’t been oil that could both harness the natural lubricating properties of plants, and give the high level of performance required by today’s car engines. Castrol EDGE BIO-SYNTHETIC is Eco-Engineered to combine Fluid TITANIUM Technology with the natural lubricating properties of plants. Made with 25% plant-based oil, Castrol EDGE BIO-SYNTHETIC is both Titanium strong and renewable. Castrol EDGE Bio-Synthetic gives you the confidence to demand maximum engine performance from today’s modern, sports, performance, and luxury vehicles requiring a high level of protection. PIONEERING WITH PLANTS TO PUSH THE BOUNDARIES OF PERFORMANCE.
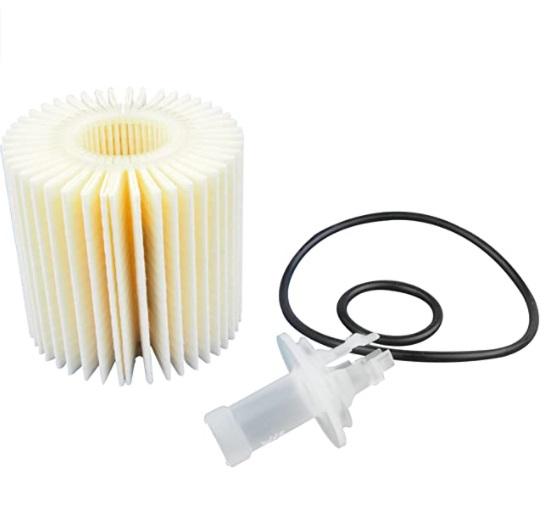
Oil Filter (By Manufacturer) – Toyota recommends using a Toyota Genuine Oil Filter. If you are driving in dusty conditions, then an OEM oil filter can prevent contaminants from reaching the engine. A high-quality aftermarket filter may also be used if it meets or exceeds the filtration performance of the factory part and follows all recommendations provided by the vehicle manufacturer.
How to Change Oil By Yourself – Step by Step
In this article, I will show you the step-by-step procedure of how to change the oil in your 2011 Toyota Sienna yourself. All information was collected from my personal experience and multiple forums that discuss these procedures.
Please note: It is very important for me to mention that any time you work with a car’s engine or other parts; there are risks involved and it can be dangerous if not done properly. If anything does happen during the process, please consider hiring someone who has experience working on cars such as an auto mechanic because they know what they’re doing when handling sensitive components like engines.
With all said and done, let us begin!
First of all, it is necessary to have the right tools. The following are the list of items you will need:
- Socket Set with Small Sizes
- MOTOR OIL
- New Oil Filter
- a 14-millimeter socket
- Ratchet
- Special oil filter tool with extension
- Jack Stands
- Oil Drain Pan
- Funnel
It is important that you purchase a new oil filter because if there’s any debris left in your car then changing out an old one can potentially be harmful to your engine later on down the road.
STEP 1: PREP

I always recommend starting off by jacking up the car with a jack stand and securing it in place. This is one of the most important safety precautions you can take when working with cars because if your vehicle slips off then someone could get injured or even killed! You want to make sure that nothing will happen to you by doing this step first.
Next, we need to remove anything attached underneath your front bumper such as an under-carriage plastic cover for aerodynamics purposes which I find aesthetically appealing but not necessary when making these changes.
Now that everything has been removed from underneath your 2011 Toyota Sienna, all that’s left are two oil pan bolts located on each side of where you just took out the plastic piece. We have successfully found our drain plug so now we can continue with the next step!
STEP 2: REMOVE THE COVER
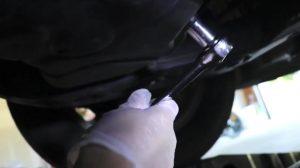
The oil drain plug is located on the bottom of your Toyota Sienna’s engine. You will need a ratchet and socket set to remove it, as well as an oil pan or bucket. If you don’t have either one available, anything with a large open mouth will do – such as a paint can! Make sure that whatever tool you use has enough capacity for all of the old oil in your 2011 Toyota Sienna’s engine.
Once you have your ratchet and socket inserted, put it on the drain plug and turn counter-clockwise to release it. This will take a little bit of elbow grease but the plug should come loose after about ten or fifteen turns.
STEP 3: DRAINING THE OIL
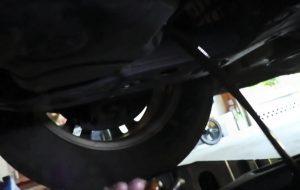
It is now time to drain the oil from your engine. Simply open up the drain plug on the bottom of your car in order to let all of the oil leave naturally.
Then close this opening when no more liquid comes out so that dirt does not enter into your vehicle while changing its own fluids.
STEP 4: REPLACE THE OIL FILTER
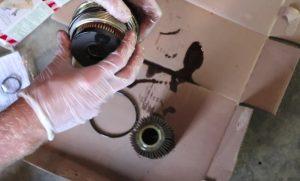
Now it is time to change the oil filter on your 2011 Toyota Sienna. This process should take about 15 minutes once you have everything ready to go.
To get started, locate the oil filter cap which may be attached by screws, wing nuts, lock tabs or just snap into place. Once you are certain that nothing else needs to come off of the vehicle before changing out this part then unscrew whatever type of fastener holds it in place and let all of the fluid strain out onto whatever container you’ve chosen.
Now use either some tongs to remove the old filter and set it aside in a safe place. It is highly recommended to clean this piece with some parts cleaner or soap. Once everything is cleaned up, put on your gloves if you haven’t already done so and taken out the new oil filter from its box/packaging/container. Be very careful about touching any of the rubber gasket surfaces as they can be rather delicate and don’t work well once dirty.
Now simply screw on your new component by hand until snug then replace whatever fastener was holding in place earlier using either an adjustable wrench or socket wrench depending upon which one you have available. Once this is done, wipe off your hands to remove any oil residue that may have come into contact with them then go ahead and replace all of the other components you took off earlier in reverse order.
STEP 5: PUT BACK THE DRAIN PLUG
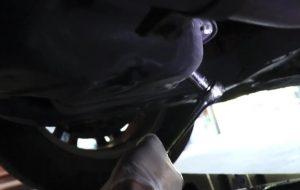
When the oil is completely drained, replace the drain plug and tighten it by hand. Don’t use a wrench for this step because you could cross-thread the bolt if you aren’t careful.
STEP 6: ADD THE NEW OIL
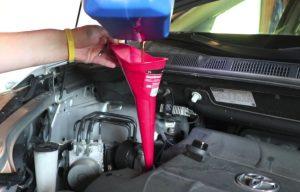
Once your oil filter is done draining, you can put the drain plug back in.
Then it’s time to add new motor oil. This requires a bit of elbow grease and patience, so take this step to slow if need be.
Pour it into the engine through one of your openings above where old fluid was drained. After the new oil is in check under your car for any leaks that might have appeared due to loose or faulty parts.
If you see a leak, make sure to tighten all of the parts that might be causing it.
After filling up every container accordingly; we are finally done changing out cars oil for today!
